This article is about a PowerShell script to find sql instances on remote server. Not to mention the remote server can be standalone or Cluster.
When I got the requirement to develop the script, I thought it is not a big deal. Generally speaking, PowerShell will have some direct commands to do so and my script is few searches away.
But when I put my feet in, I got to know it was not as easy as I thought.
Especially the real challenge comes in when you have to list the SQL Instances for a SQL Cluster. The script should be intelligent enough to find out if the server is cluster or standalone and accordingly list the SQL Instances.
Note:The script should run from a server where FailOver Clustering Feature is installed.
PowerShell script to find sql instance name on remote server
Param(
    [Parameter(Mandatory=$true)]
     $ComputerName
)

if ((Get-WMIObject -Class MSCluster_ResourceGroup -ComputerName $ComputerName -Namespace root\mscluster -ErrorAction SilentlyContinue) -ne $null)
 {
    Import-Module FailoverClusters
    get-clusterresource -Cluster $ComputerName  -ErrorAction SilentlyContinue|
    where-object {$_.ResourceType -like “SQL Server”} |
    get-clusterparameter VirtualServerName,InstanceName | group-object ClusterObject |
    select-object @{Name = “SQLInstance”;Expression = {[string]::join(“\”,($_.Group | select-object -expandproperty Value))}}
    }
else {
$SQLInstances = Invoke-Command -ComputerName $ComputerName {
(Get-ItemProperty 'HKLM:\SOFTWARE\Microsoft\Microsoft SQL Server').InstalledInstances
}
    foreach ($sql in $SQLInstances) {
       [PSCustomObject]@{
           ServerName = $sql.PSComputerName
           InstanceName = $sql
       }
   }
   }
Not to mention, you can execute it from PowerShell ISE or from PowerShell Command prompt. Let’s see both examples.
Execute The Script Through Windows PowerShell ISE:
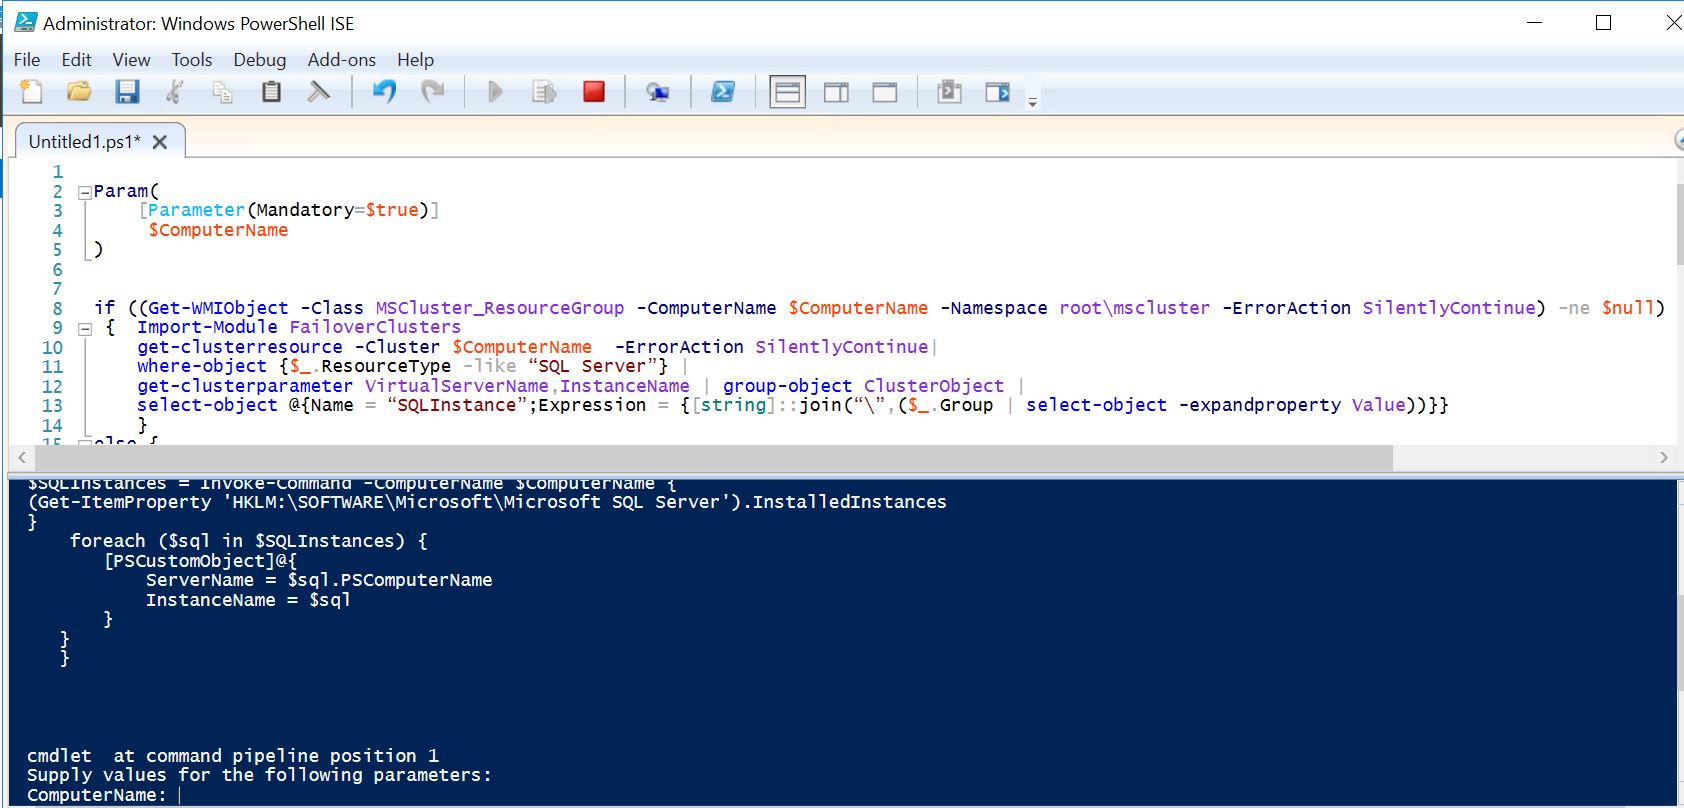 Once you execute the script you’ll be prompted to provide the Server Name as you can see in the last line in above screen shot.
Sample OutPut: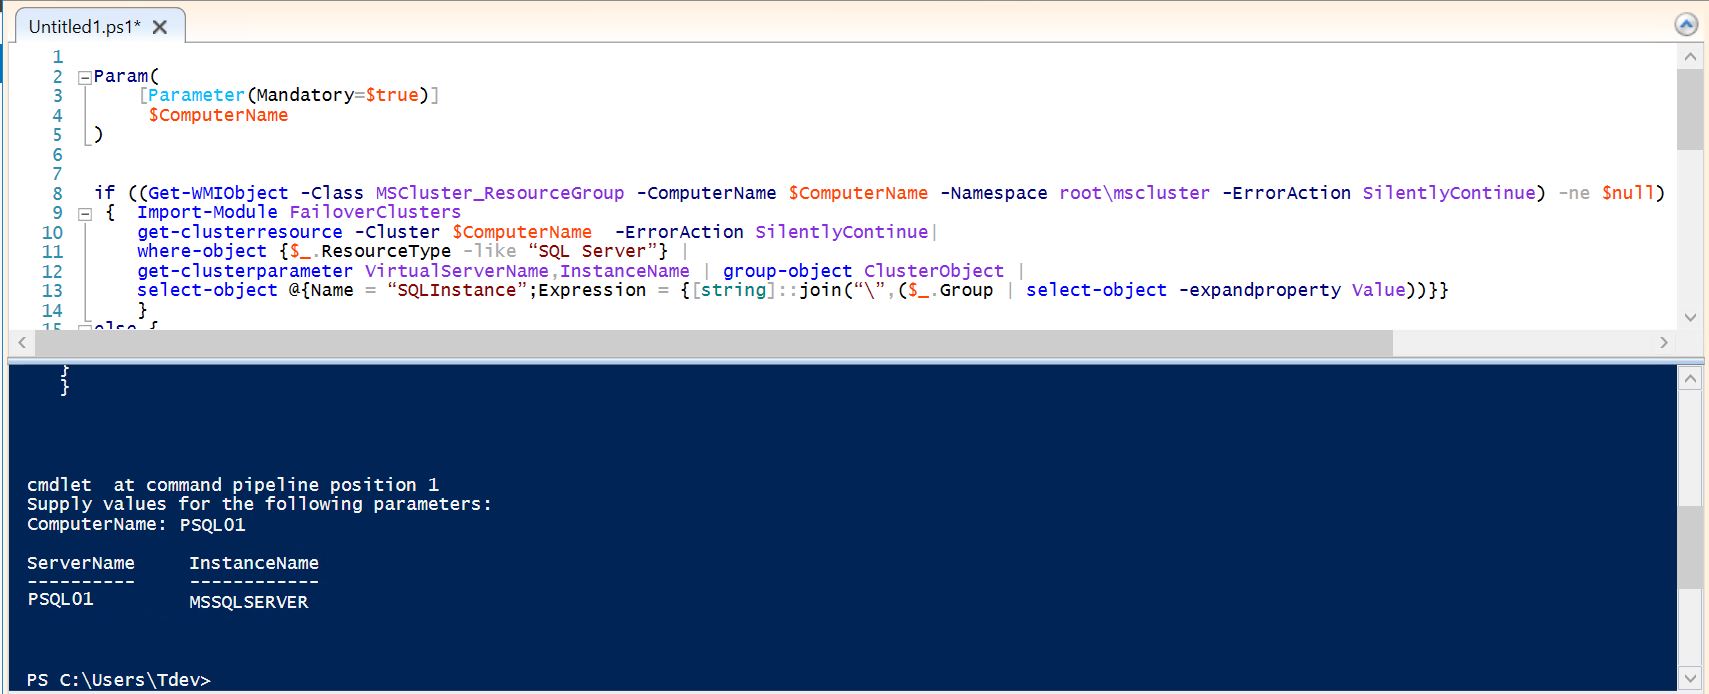
Execute the Script from Windows PowerShell Command Prompt: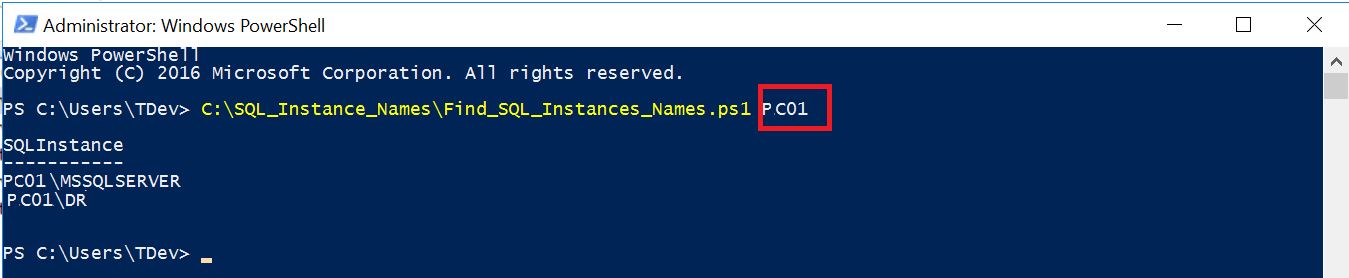
Only difference is to provide the server name while running the script as shown in the screen shot. Also the SQL Instance “PC01” is a cluster. Hence you don’t have to bother if the server is standalone or cluster. Hope this helps.
Let me know if you have any questions or comments.

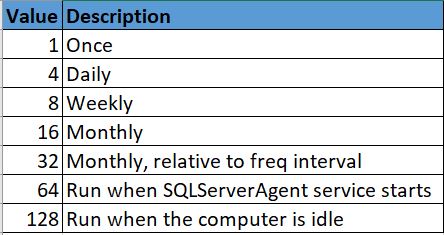
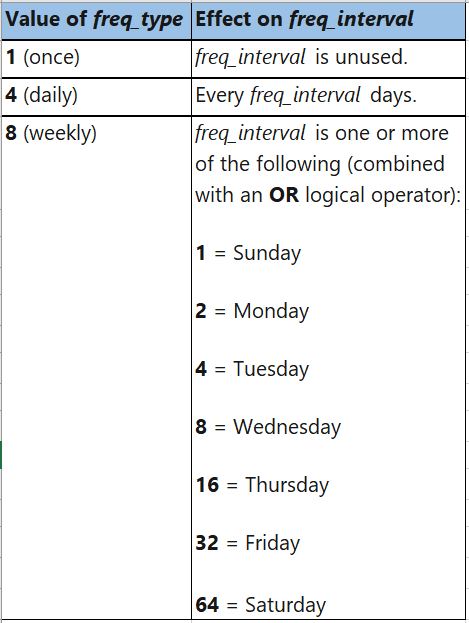
 freq_interval: The days that a job will execute.