This article is about DBA steps during OS Patching in SQL Server Always On and in continuation of the Steps in SQL Server Always On during OS patching. Please read the first article if you have directly landed on this page.
Till now you have seen why database backup is important and how to Validate Synchronization State. Now let’s see how to change the failover mode. Why we need to change, you already know from first article.
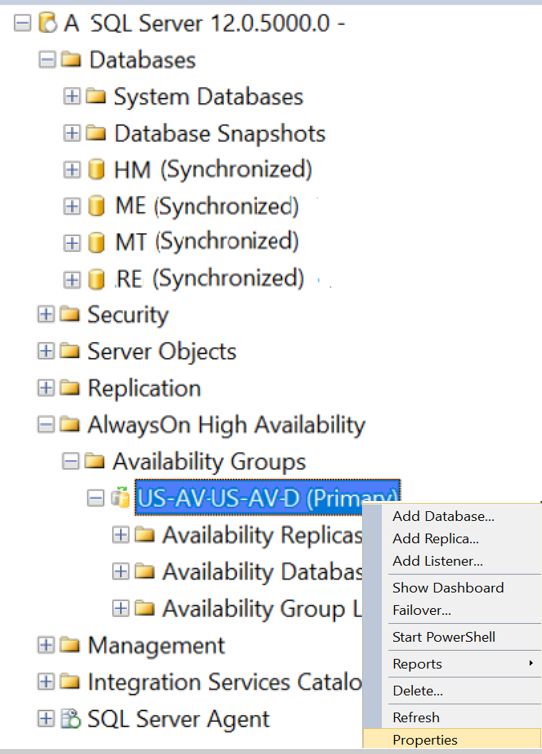
How to change Failover Mode:
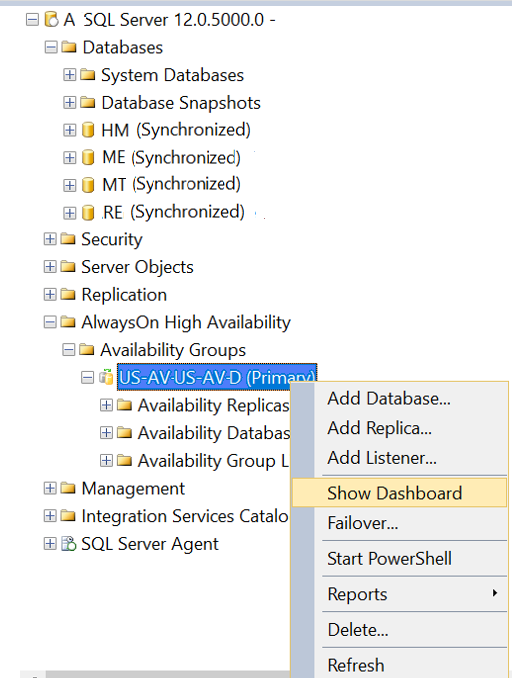
Right Click on AG Group on Primary > Properties:
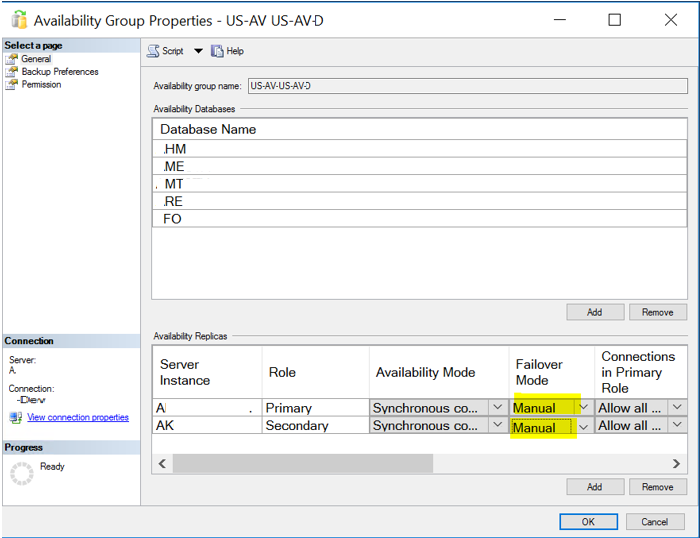
Change the Failover Mode to Manual and click OK:
4. Now you can apply the OS patch on secondary Node. If you are DBA then request Intel to patch the secondary server. Do not failover the cluster resources to other node. You can reboot the secondary server after reboot.
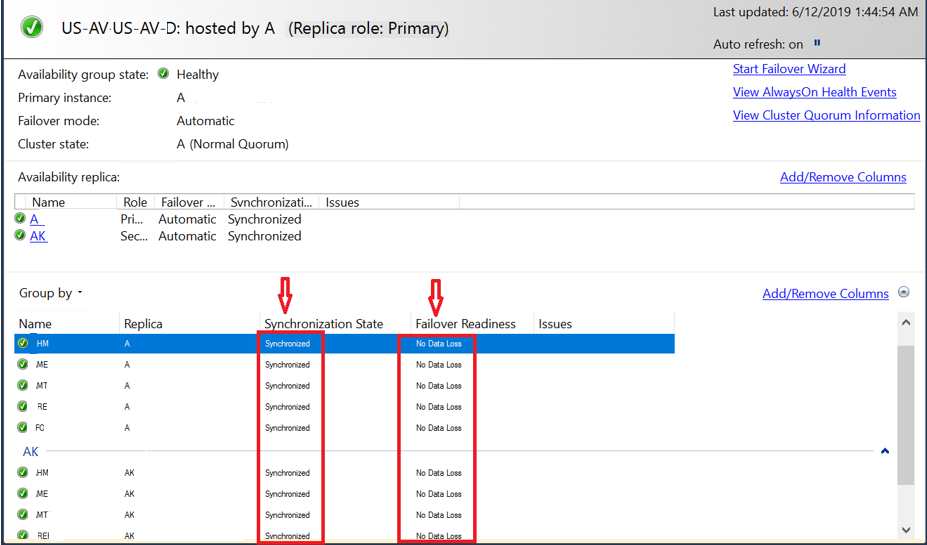
5. After secondary server comes back online, wait until databases are in SYNCHRONIZED state and make sure Failover Readiness shows No Data Loss as described in Step 2) Validate Synchronization State, described in first article.
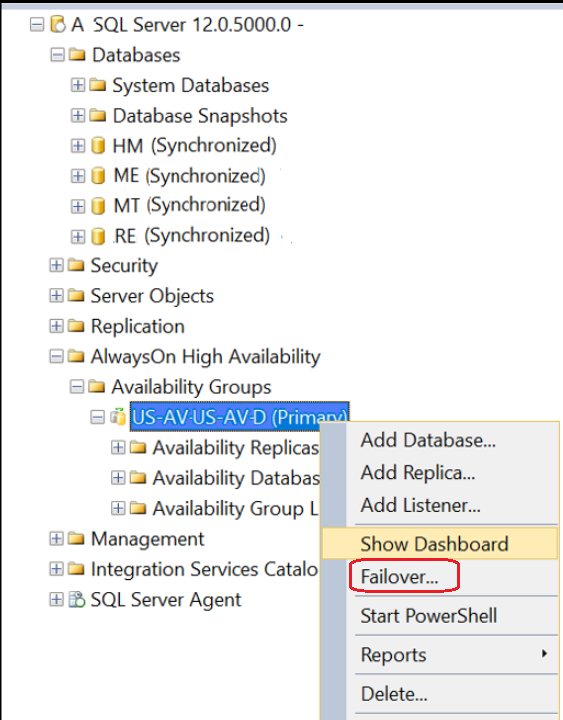
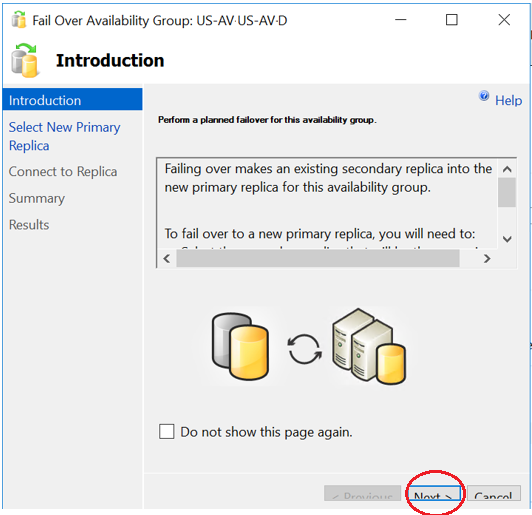
6. Availability Group (AG) Failover:
Fail over the Availability Group (AG) to the secondary replica using SSMS (SQL Server Management Studio) and not from Failover Cluster Manager.
Right Click on AG on Primary and Choose Failover:
Click Next:
Select the new Primary Replica and click Next:
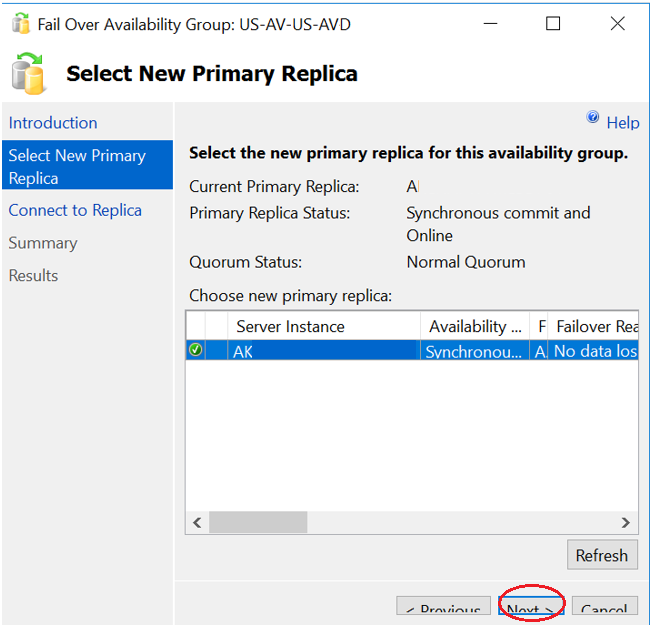
Next step would be to connect to the Replica to failover.
7. Wait until all the database synchronization state becomes SYNCHRONIZED. Follow the instructions in Step 2) Validate Synchronization State. (Refer first article)
8. Once all the Db status become Synchronized, you can start OS patching activity on new Secondary.
9. Keep monitoring the log file growth and if it is about to get full then we may need to remove the database from Always ON AG to prevent it from going to suspect mode.
10. Once the activity completed monitor until the databases become SYNCHRONIZED. Follow the instructions in Step 2) Validate Synchronization State.
11. Failback the AG to the original node and wait until all databases become SYNCHRONIZED. This step is not mandatory and depends upon the application setup.
12. Lastly the node acting as the primary replica, change the failover mode back to Automatic. In fact you should not forget this step. Please follow step 3) Failover Mode.
Hope this helps and leave you comments or questions.
You may also like to read the following articles:
Tempdb space issue in AlwaysOn secondary Replica
SQL Database Restore using NetBackup