This article is in continuation of How SQL Agent Job Schedule Got Changed Automatically. Here we’ll see how to find the root cause and resolve the issue. Please go through the first article if you have directly landed here to understand what issue we are talking about.
Script to check the SQL Agent Job Schedule details
Execute the below script on the SQL Instance:
SELECT sj.name, jc.schedule_id, jc.job_id
FROM msdb..sysjobschedules jc
INNER JOIN msdb..sysjobs sj
ON jc.job_id = sj.job_id
Output:

As you can see the schedule_id (9 in this example) is same for both the jobs “Agent Job A” and “Agent Job B”. This is the point often overlooked. To put it another way, when you script out one job to create another, the schedule_id remains same. Hence whenever you change schedule of one job, it will change all other job’s schedule having the same schedule_id. Now lets see how to fix the issue.
Script to change the schedule_id of a SQL Agent Job
Execute the below query to change the schedule_id of the job “Agent Job B”. Not to mention that you need to change the cheduler_id and job_id in the script.
UPDATE msdb..sysjobschedules
SET schedule_id=1  --Put a unique value
WHERE job_id='9AC70265-8620-402E-BAD2-87F77D528B5C'  -- Change the job_id as per your job
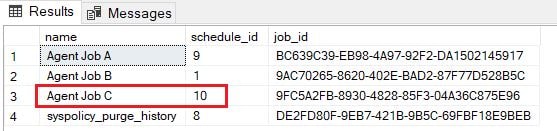
Now if you run the first script again to check the SQL Agent Job Schedule Id, you can see change as highlighted in the screen shot.

After you change the schedule_id, you can edit the “Agent Job B” schedule without affecting “Agent Job A”.
Until now we have seen how to resolve the existing issue. Now let me show you how to prevent this while creating a job from another job script.
How to prevent having same schedule_id
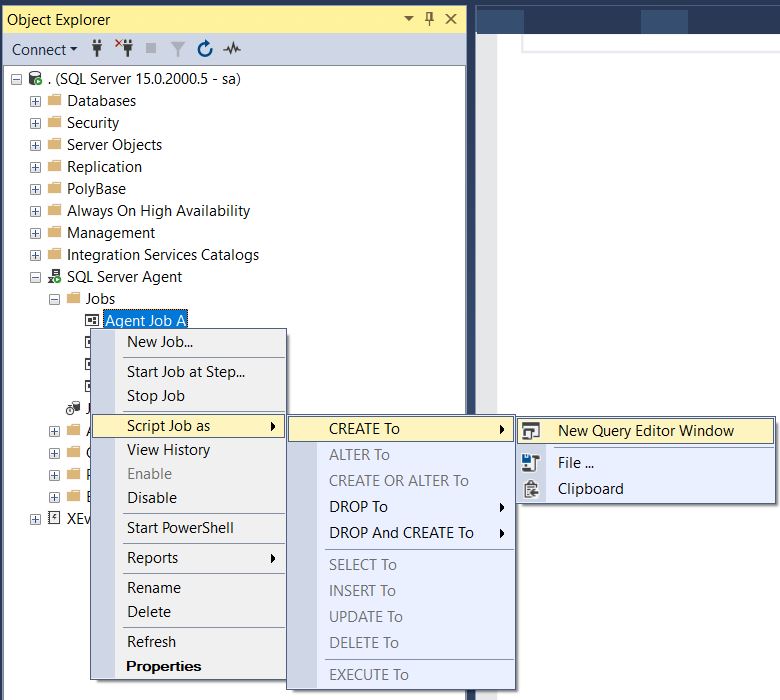
Yes, you can very well avoid this by minor change while executing the script of another job. In this example I am going to create another job named ” Agent Job C” by scripting out “Agent Job A”.
Script out the job:
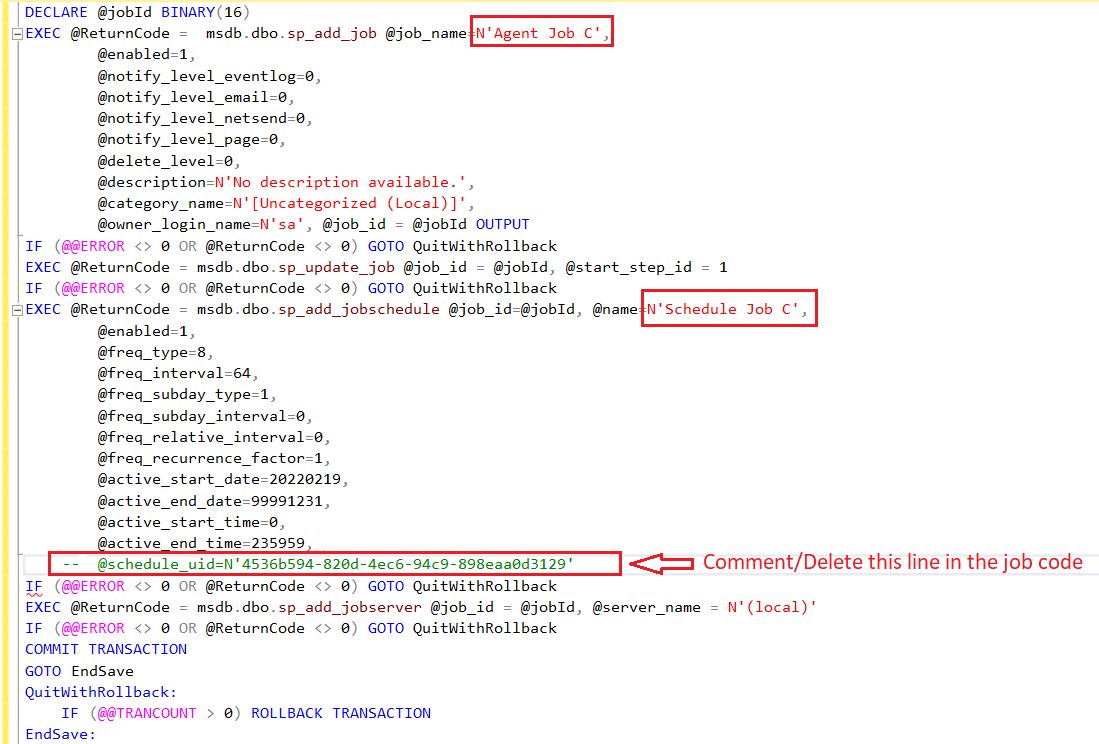
You just need to comment/Delete the reference of @schedule_uid in the job code as shown below:
Now, let’s execute the first query provided in this article again to check the schedule_id of the jobs:
Summary:
SQL Agent Job schedules are tied with Schedule_id. If you ever come across a situation when changing the schedule of one SQL Agent job affects other Job schedules you need to change the schedule_id of one of the jobs. Always remember to comment out/delete the reference of schedule_uid whenever you script out a job to create another job.
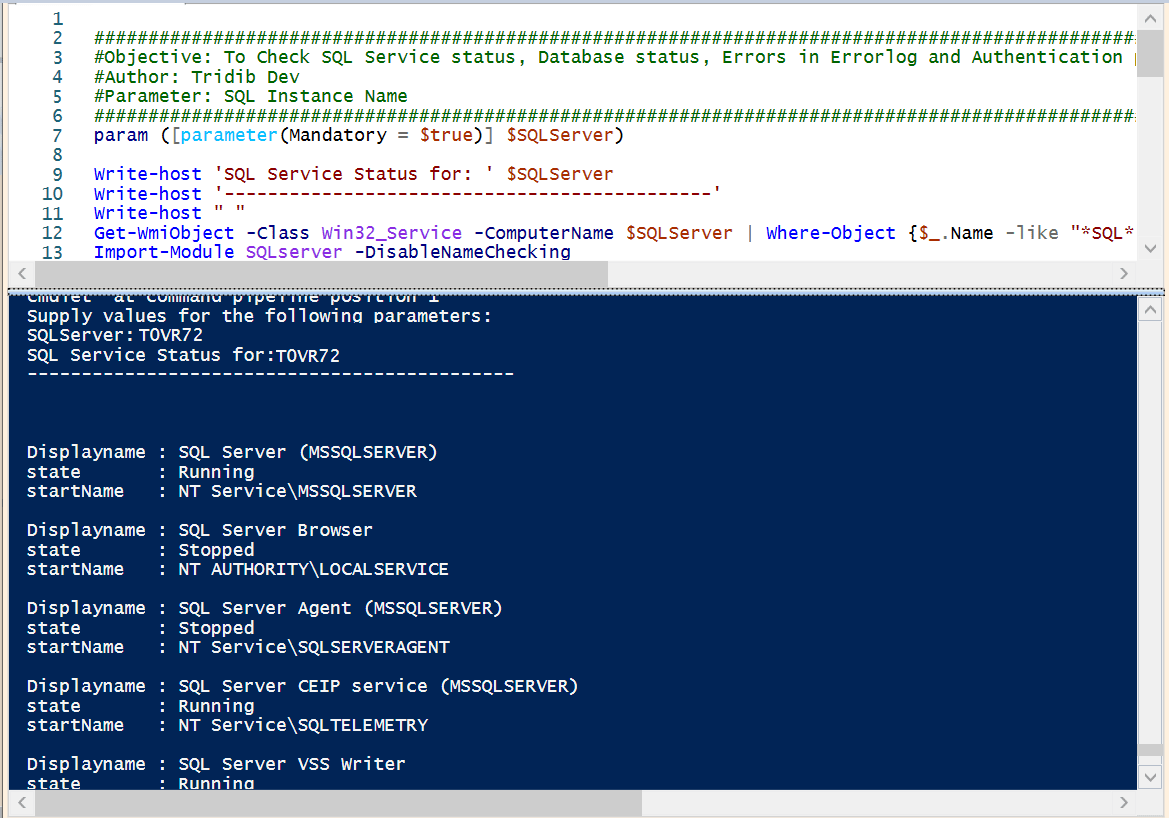
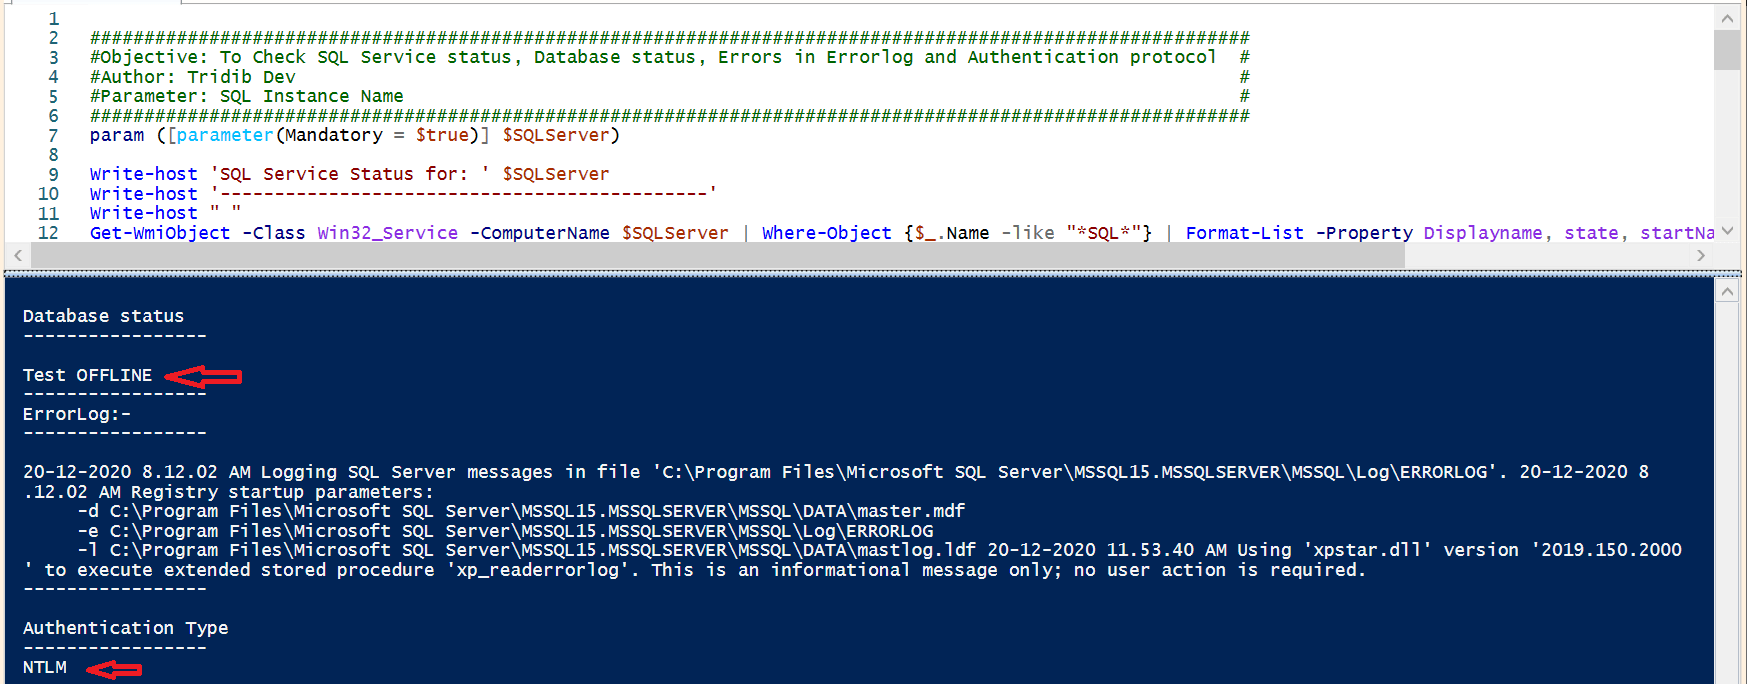
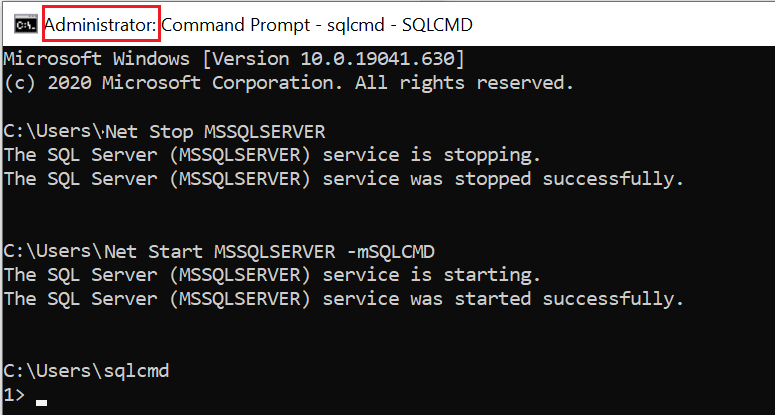

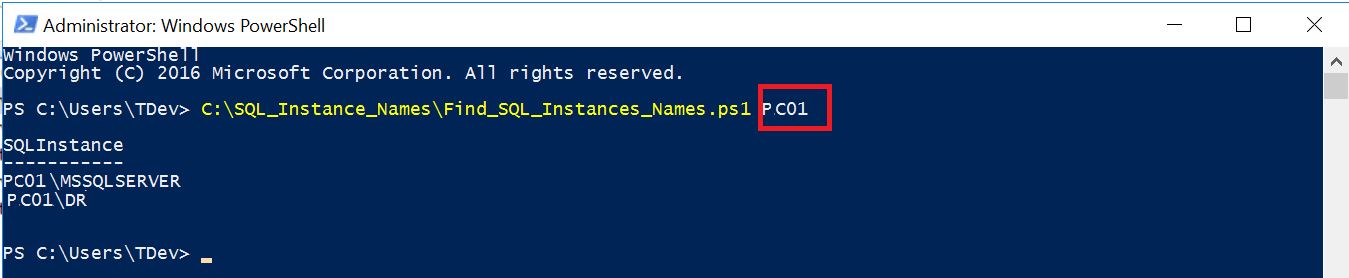
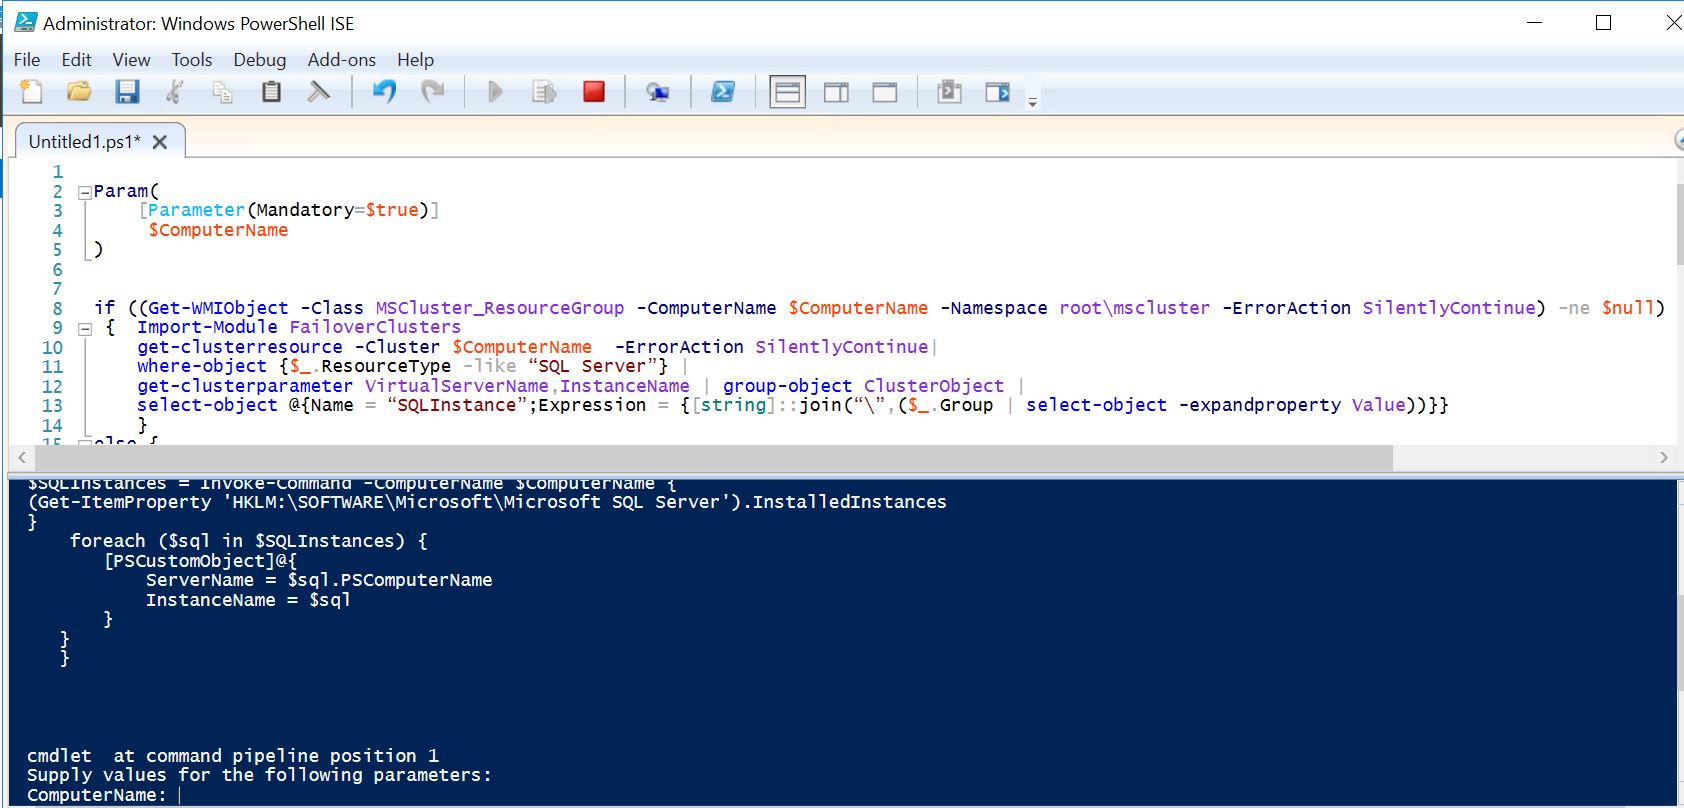 Once you execute the script you’ll be prompted to provide the Server Name as you can see in the last line in above screen shot.
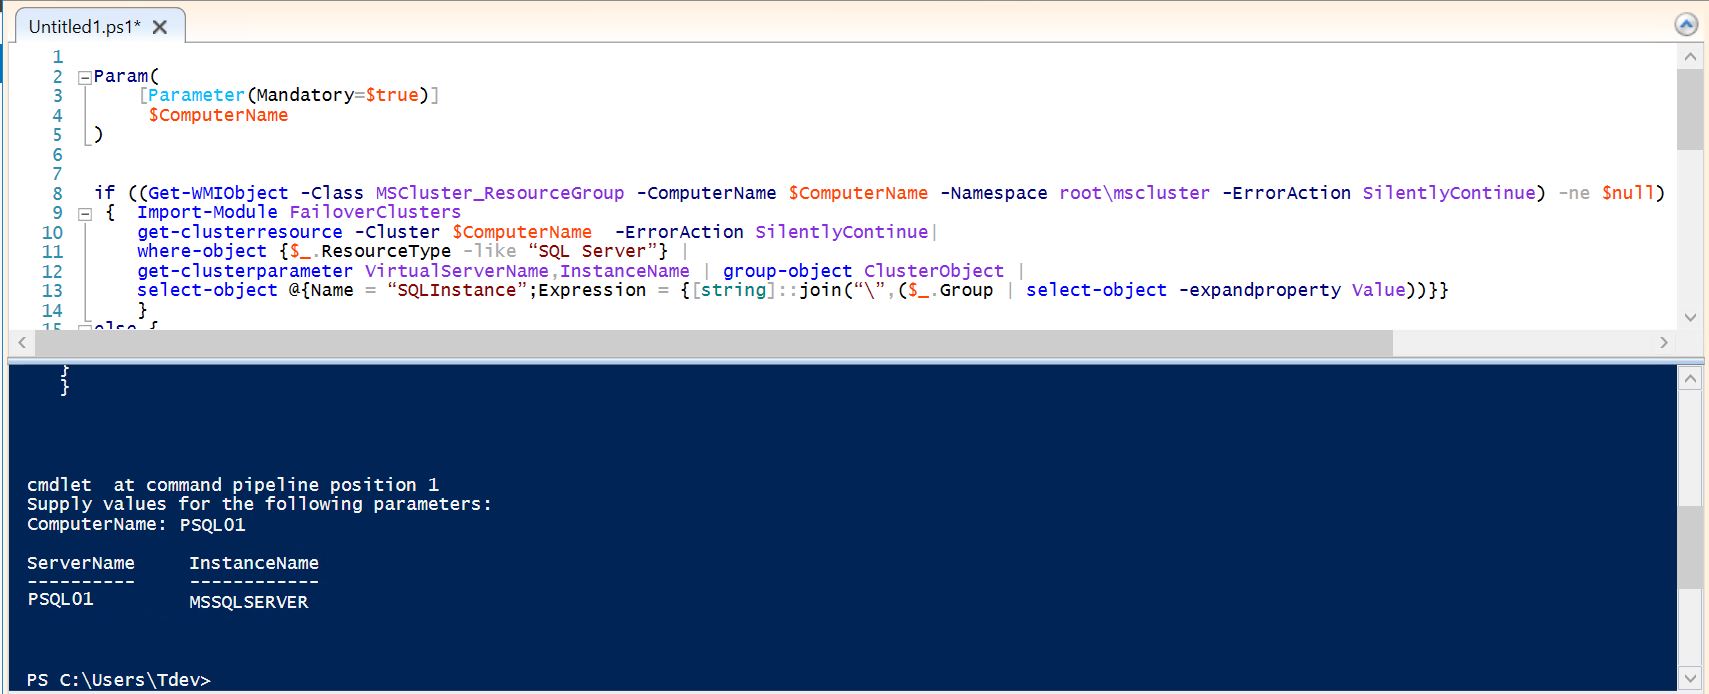

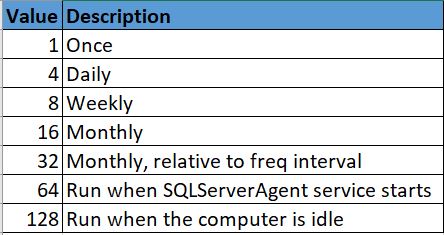
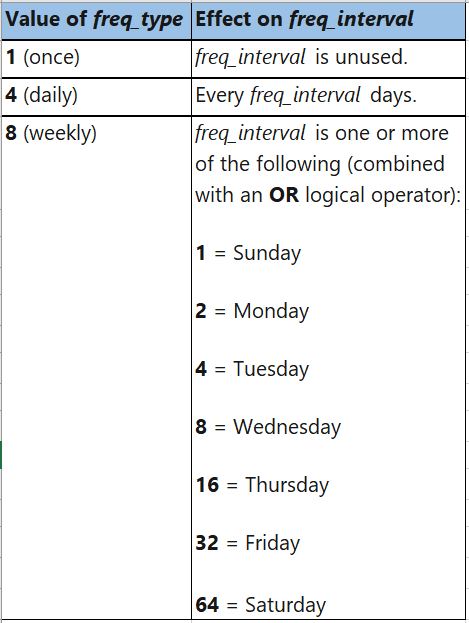
 freq_interval: The days that a job will execute.