Hey there, this article is about understanding and resolving the error message “Error 15141: The Server Principal Owns One or More Availability Groups and cannot be dropped”.
Introduction
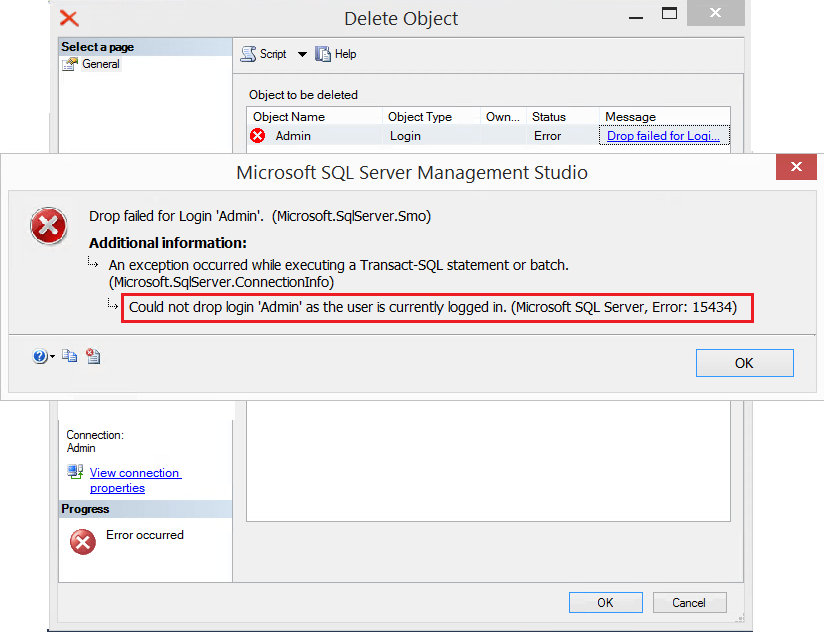
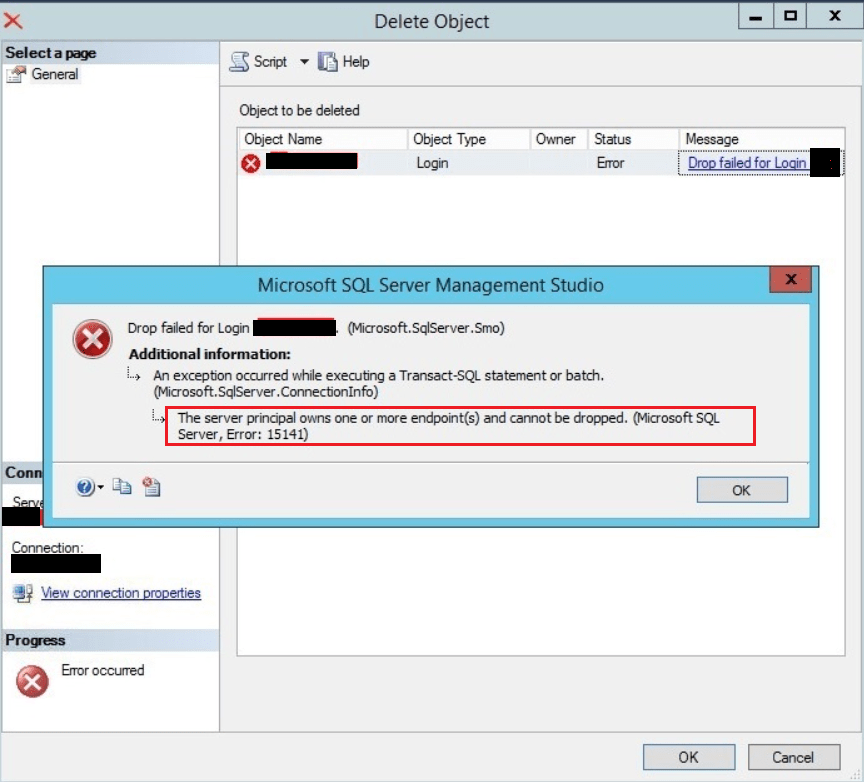
First of all let me tell you that the above mentioned error occurs when you try to delete a login in a SQL Server Always On Instance. The error message clearly says that the Login Owns an Availability Group(s). In SSMS the error message looks like as shown in the below screen shot.

Why does the Error 15141: The Server Principal Owns One or More Availability Groups occur in SQL Server?
SQL Server does not allow you to drop any login or Server principal which owns any objects. In this case the server principal is owning an Availability Group. If it allows to drop the login then the Availability Group will become orphaned and that is why SQL Server does not allow to do so.
Now the next question is how come the login has become the owner of the Availability Group. This is because the login had created the Availability Group while configuring Always On. Does it create any issues as far Always On functionality is concerned? NO, it does not. Then why you need to drop the login?
This is mostly because of the Organization standards. No individual login id should own any Availability Groups. Imagine if the the user leaves the organization and the Id has been removed from Active Directory.
Resolution:
To resolve the error first thing the DBA should do is to identify the list of Availability Groups owned by the login or server principal. Once you have the list, you need to change the ownership to ‘sa’ or any other login as per your Organization Standards. I always say don’t panic and never try to delete the Availability Group itself.
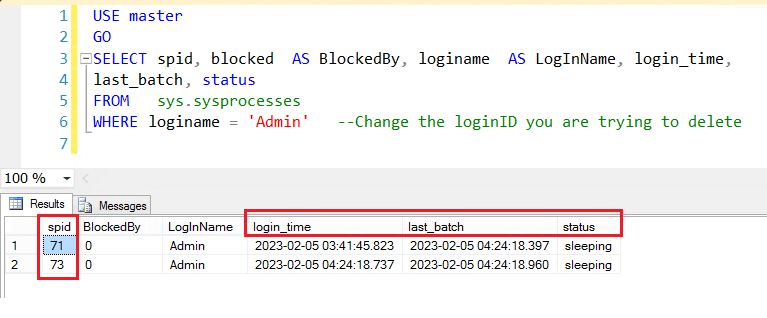
1.Query to Identify the Availability Groups the login Owns:
SELECT ag.[name]  AS availability_groups_name
    ,sp.[name] AS owner_name
    ,ag.group_id
    ,ar.replica_id
    ,ar.owner_sid
FROM  sys.availability_groups ag
JOIN sys.availability_replicas ar ON ag.group_id = ar.group_id
JOIN sys.server_principals sp ON ar.owner_sid = sp.[sid]
WHERE sp.[name]= 'GLOBAL\Dev' -- Change the login name
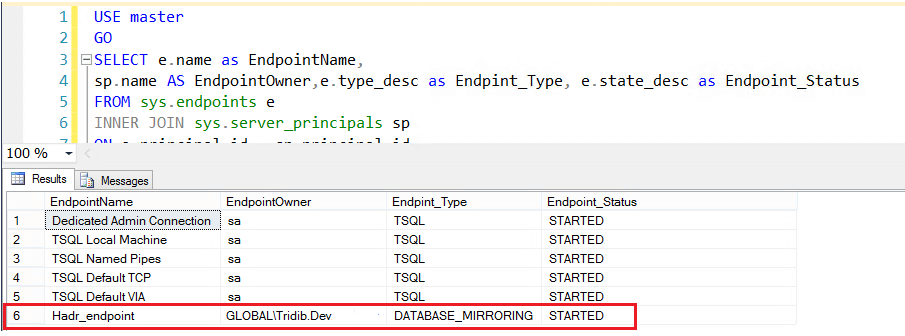
Sample Output:
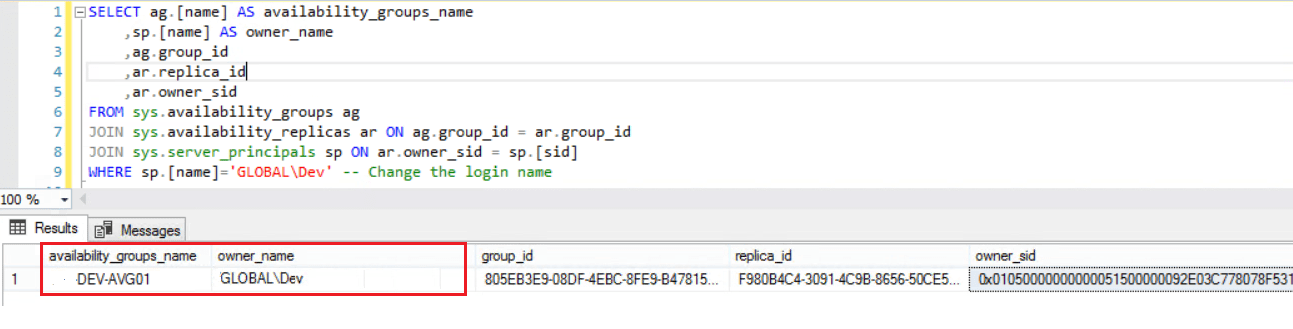
Notably the above output shows that the login ‘GlOBAL\Dev’ owns the Availability Group “DEV-AVG01′. Now we’ll change the owner.
2. Query to Change the Availability Group Owner:
 USE [master]
 GO
 ALTER AUTHORIZATION ON AVAILABILITY GROUP::[DEV-AVG01] TO [sa];
 GO
Now again run the Select query to check the Ownership. Once confirmed you can try dropping the login id.
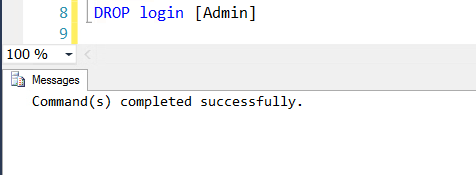
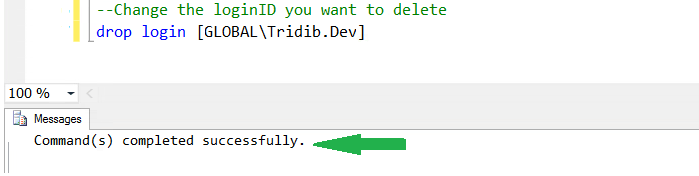
3. Drop the Login:
 USE [master]
 GO
 DROP LOGIN [GLOBAL\Dev]  --Change the login
 GO
Summary
To conclude, the Error 15141: The Server Principal Owns One or More Availability Groups occur in SQL Server is one of the common errors DBAs encounter while working on SQL Server Always On Instances. Specifically the error occurs when you try to delete a login or server principal which owns one or more availability Groups. While troubleshooting, first thing to remember is not to take any hasty decision. Particularly in Production. The DBA must first list out the Availability Groups owned by the login and then change the ownership to a different login id as per Organization standards which will resolve the issue.
You can also refer the following articles if you are facing Error 15141: The Server Principal Owns One or More Endpoints
Or Error 15434: Could not drop login as the user is currently logged in