Hi There! Today we’ll discuss different ways to Identify SQL Server Service Account. This is another Interview Question for beginner to Intermediate level SQL DBAs.
The SQL Server service account is the Windows account under which the SQL Server Service runs.
Ways to identify SQL Server Service Account:
- SQL Server Configuration Manager
- Services.msc
- Using T-SQL query
- Using PowerShell Script
- SQL Error Log
SQL Server Configuration Manager:
This is the most commonly used method to check the Service Account. However you need to RDP to the SQL Server.
Steps are as follows:
- RDP/Login to the SQL Server
- Got to Windows Start Button > Click on SQL Server Configuration Manager or do a windows search for Configuration Manager.
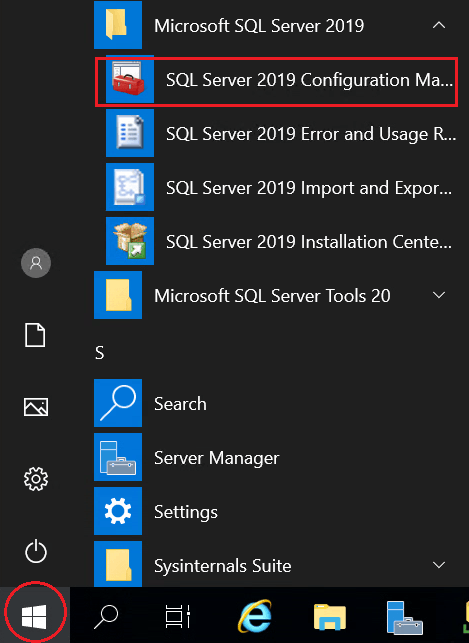
- Click on the SQL Server Services and check the “Log On As” column as marked in the following screen shot.

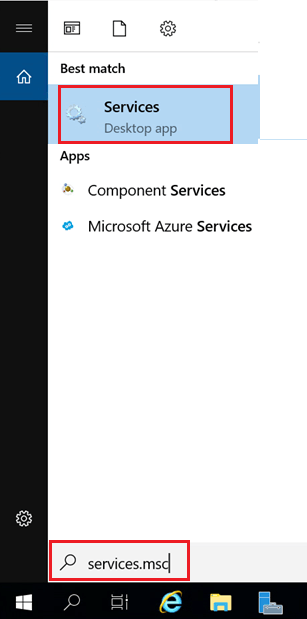
Services.msc or Windows Services applet:
You have to login (RDP) to the SQL Server. Hence remotely not possible to use this method.
- RDP/Login to the SQL Server
- Go to Start > Run > Services.msc Or just search Services.msc in windows search

Using T-SQL query:
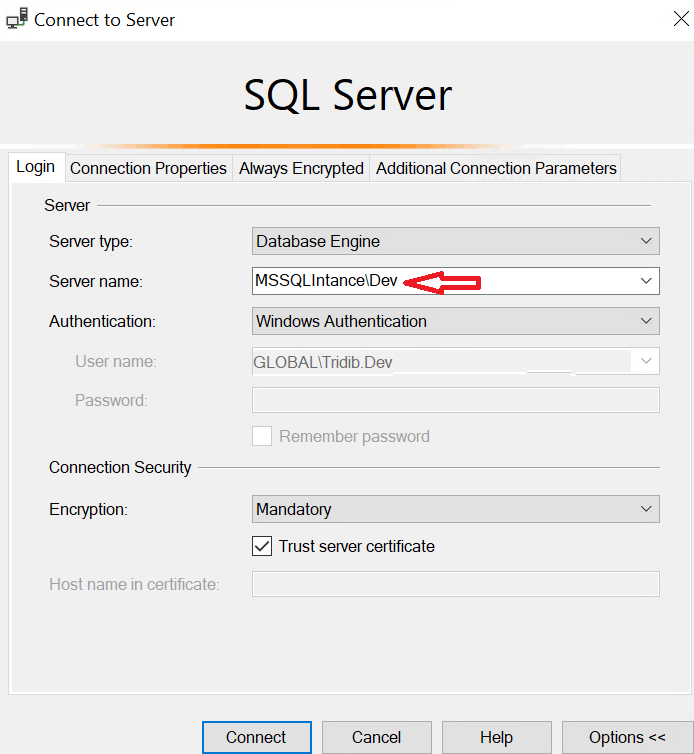
For T-SQL queries you can connect to the SQL Instance using SSMS (SQL Server Management Studio) from a jump server/centralized management server or a client machine without needing to RDP to the server.
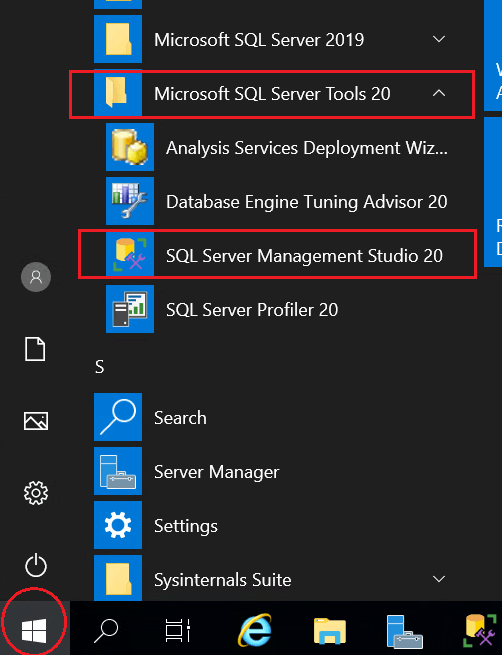
- Go to Start > Expand Microsoft SQL Server Tools > Click on SQL Server Management Studio. The associated version no. (in this case 20 may be different depending upon the client tool version installed on the server). You can also just do a windows search by typing SSMS.
- Now connect to the SQL Instance for which you want to find the Service Account information.
- Open a new query Window by pressing ctrl + N on your keyboard or by clicking New Query
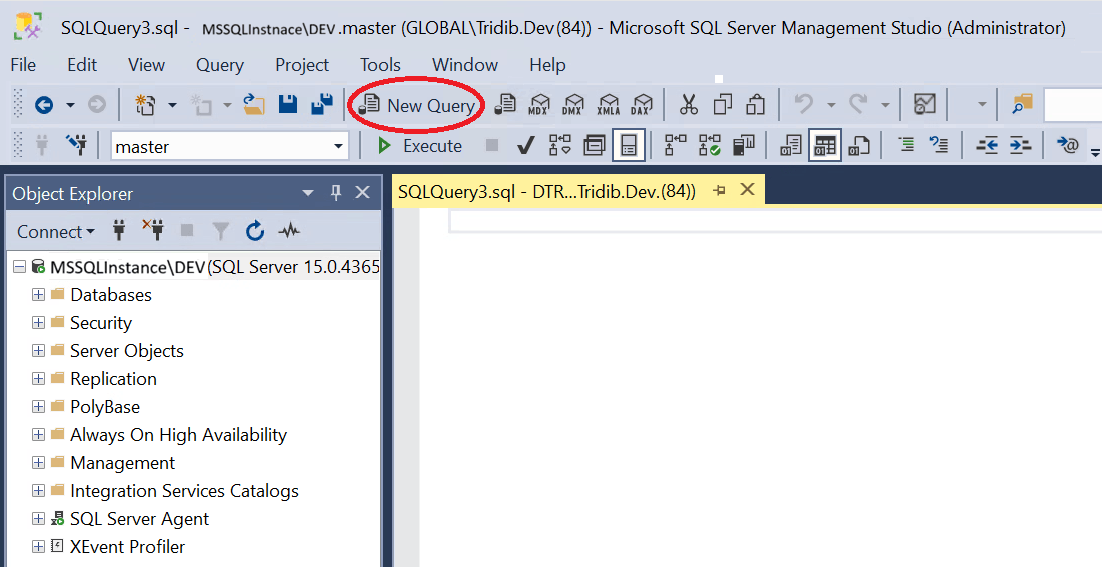
- Execute the below Query
 SELECT servicename, service_account, status_desc, startup_type_desc
 FROM sys.dm_server_services
 GO
Example Result Set:
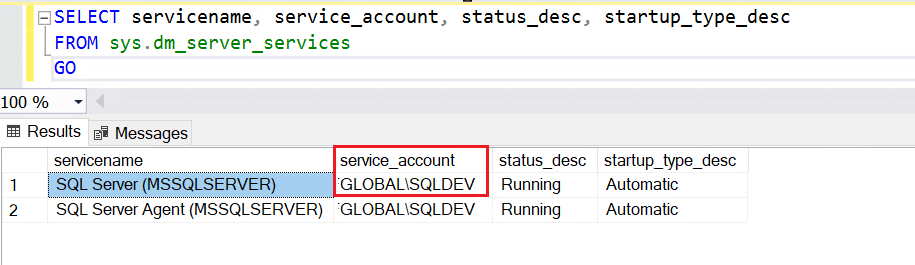
Note: The DMV sys.dm_server_services had been introduced way back in SQL Server 2008R2 SP1. Hence this query will not work on SQL Server versions prior to 2008R2 SP1.
Using PowerShell Script:
- Go to Start > Either right click on Windows PowerShell or Windows PowerShell ISE > Run As Admin. Or you can just type PowerShell in the Windows search box
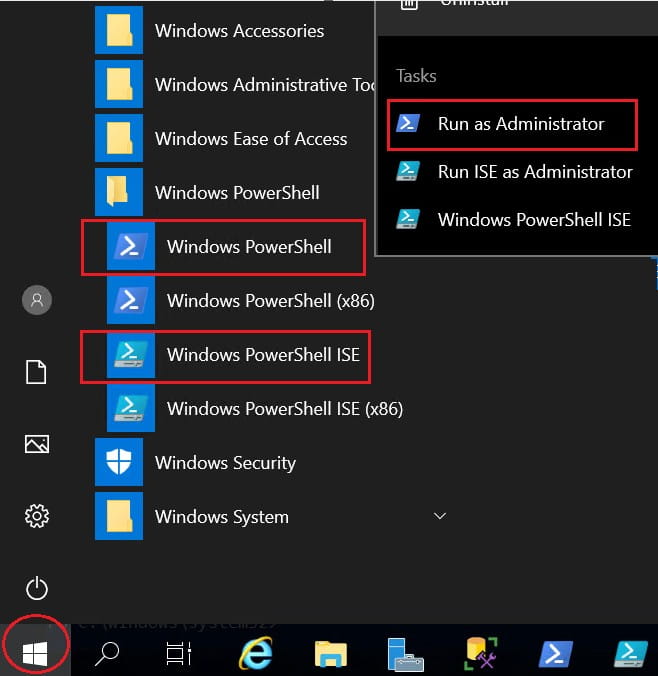
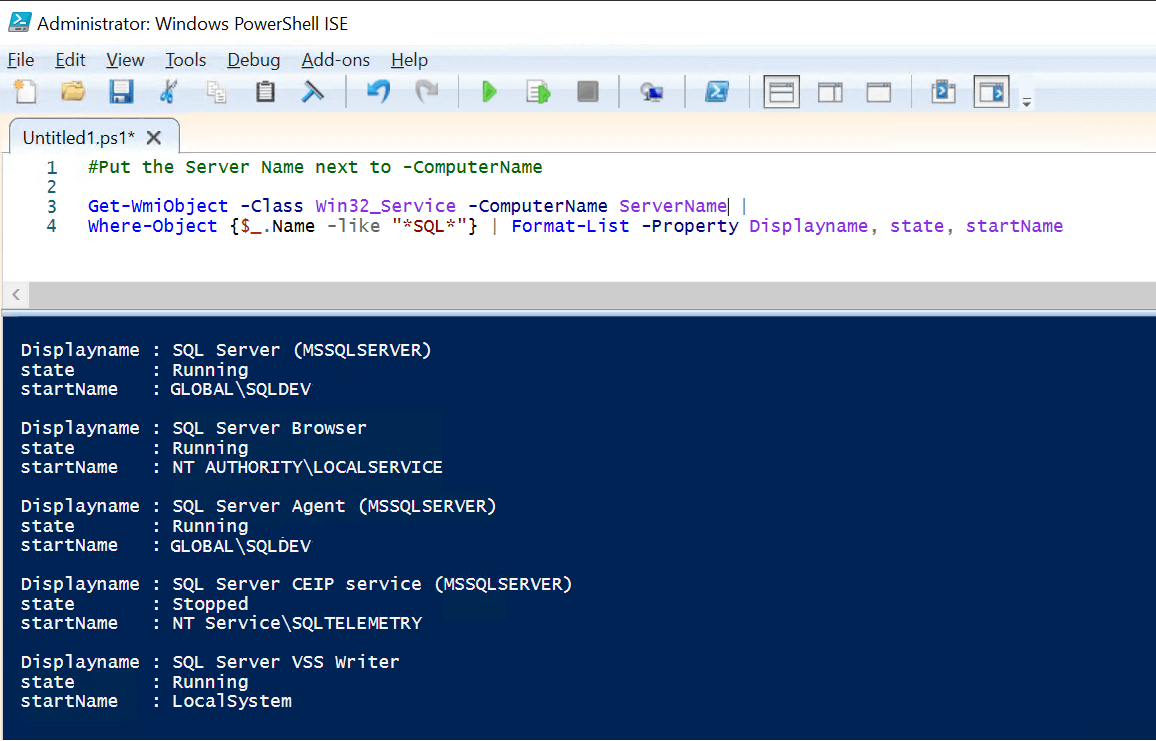
- Execute the PowerShell Script:
 Get-WmiObject -Class Win32_Service -ComputerName ServerName |
 Where-Object {$_.Name -Like "*SQL*"} | Format-List -Property Displayname, state, startName
Note: Replace ServerName by the hostname on which SQL Service is running
Example result of PowerShell PowerShell ISE:
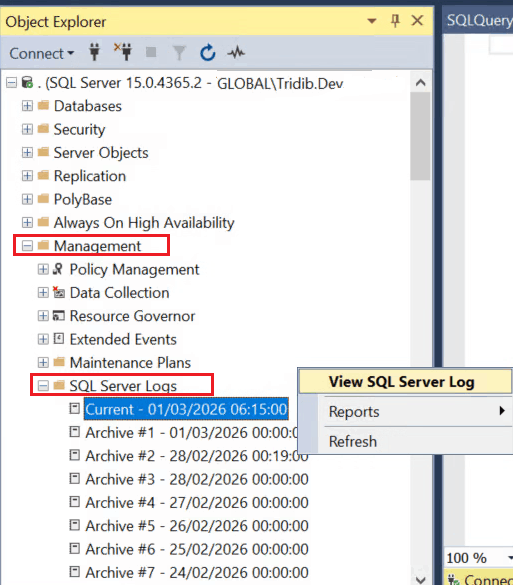
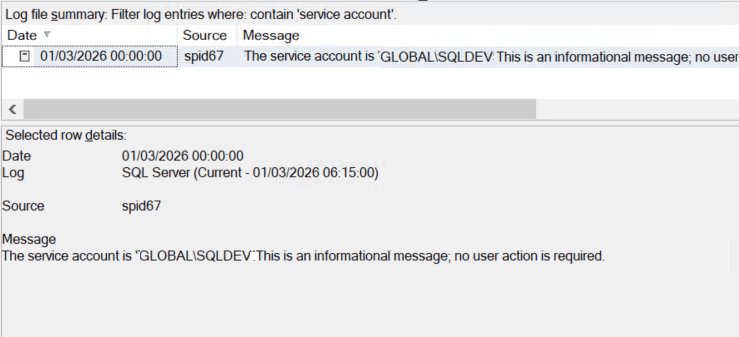
SQL Error Log:
- Launch SSMS and connect to the SQL Instance
- Expand Management > Expand SQL Server Logs > Right Click on the error log file > View SQL Server Log
- Click on Filter > Type in “Service Account” for Message contains text > Check the checkbox for Apply Filter > Click on Ok
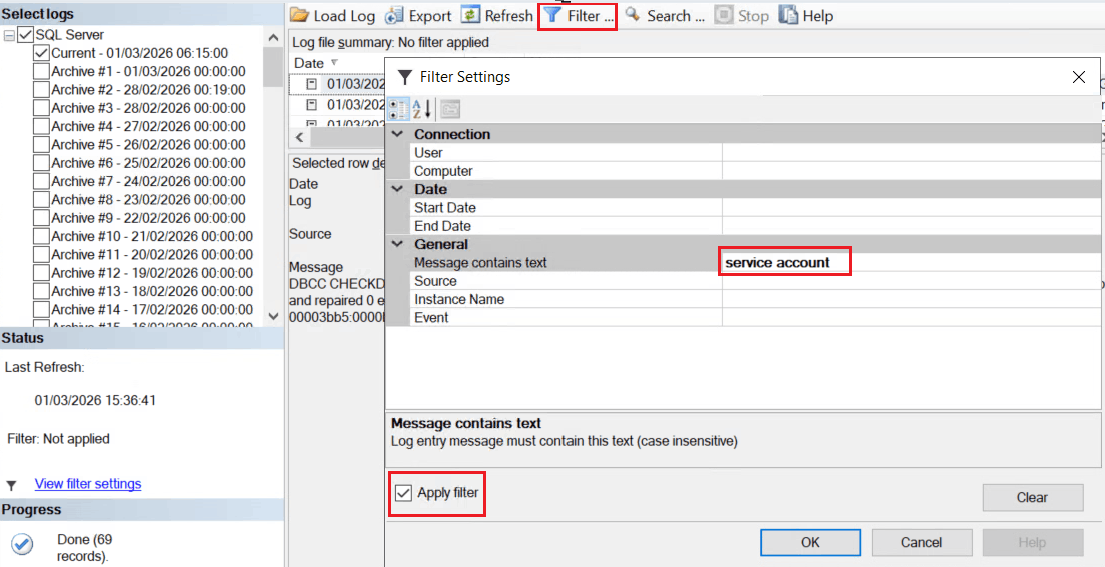
Example Result set:
You may also want to explore:
What is Instant File Initialization? SQL DBA Interview Q & A
Junior SQL Server DBA Interview Questions and Answers
SQL DBA Interview Question Answers -Part2
Junior SQL DBA Interview Questions Answers -Part3
Junior SQL DBA Interview Question Answers: Part 4


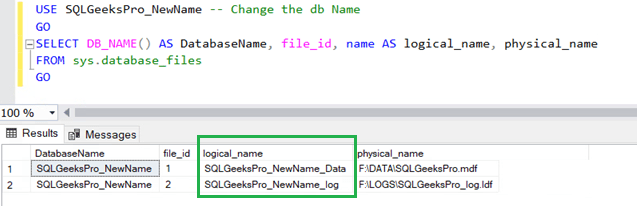
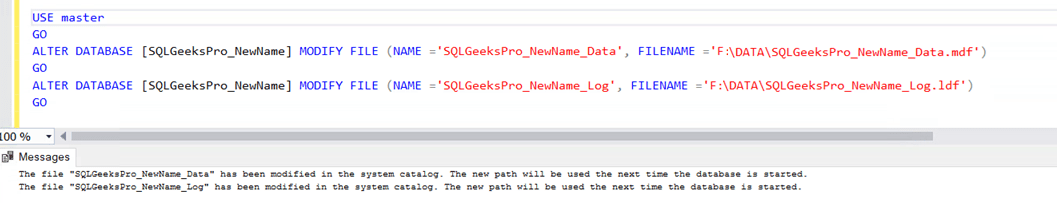
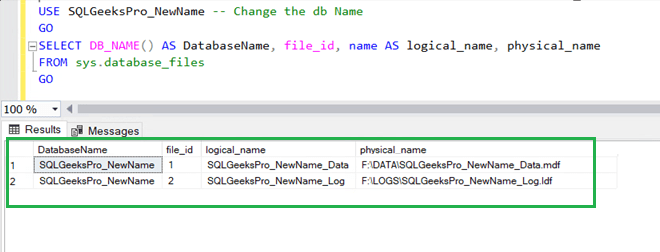
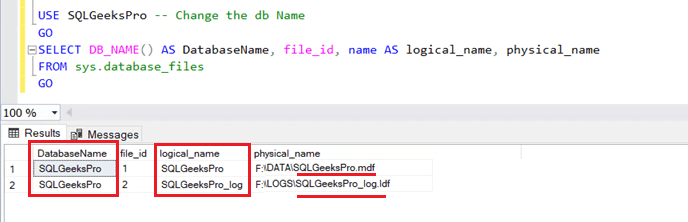
 Now let’s check the database file details again by executing the first query.